This guide will take you through all the steps required to set up StreamToMe and use its features.
The most important step to start playing media in the StreamToMe player is to set up the free ServeToMe server on your Mac or PC so that StreamToMe can access your media to play. You should install the ServeToMe server on all of the Mac or Windows computer (or computers) where your media is stored.
If you haven't installed and set up ServeToMe, then visit the ServeToMe Getting Started guide first to do that before you start with StreamToMe. The guide will take you through the download and setup steps for the ServeToMe server.

ServeToMe "Running" state.
If you have not already purchased StreamToMe, then click the link to the relevant App Store to do this now.
Once you have downloaded StreamToMe just tap its icon on the Home screen (iOS) or double click its icon in your Applications folder (Mac) to run.
While the StreamToMe player can connect from a 3G network or from a non-local WiFi network, it is strongly recommended that you try to connect to your server for the first time when both your ServeToMe server and StreamToMe player are running on the same WiFi network. Fewer things can go wrong in a simple local network connection and StreamToMe can automatically locate ServeToMe servers on a local network.
When you launch the StreamToMe app on your iOS device or Mac, the StreamToMe "Servers" screen will appear. Assuming you've followed all the steps so far, your computer's name will automatically appear in StreamToMe under the "Local servers" section.
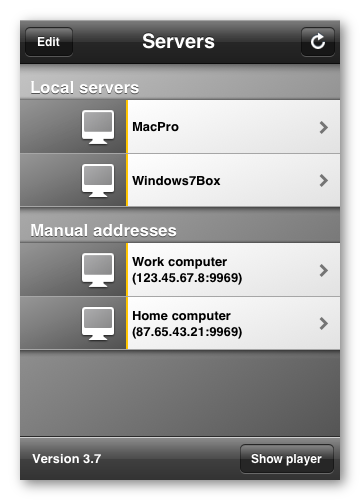
"Local servers" on the StreamToMe "Servers" screen.
If your computer's name does not appear automatically, then please take a look at the suggested steps on our Troubleshooting: Local Connections page.
Simply tap your computer's name to connect. The "Shared Folders" list on the server should appear, along with "iTunes playlists" and "iPhoto albums" below that. If you see a connection error, including "Connection timeout" or "Server not running" errors instead of seeing these listings, then please refer to the Troubleshooting: Local Connections page.
The first screen you see on your server is the "Shared Folders" screen. The list of folders from your "Shared Folders" list in ServeToMe on your computer will appear here. Simply tap any folder to browse the contents. Tap on any subfolders to browse their contents.
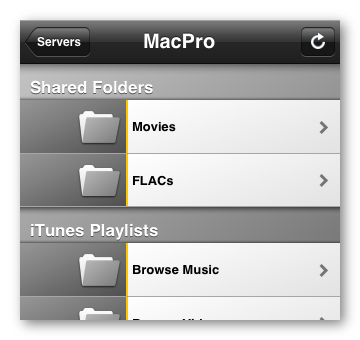
"Shared Folders" in StreamToMe.
Scroll below your "Shared Folders" at the top level to see "iTunes Playlists". At the top of the "iTunes Playlists" section is "Browse Music" and "Browse Videos". These sections will let you search your entire iTunes collection by metadata (artist, title, show, episode, etc) and will let you find files that do not appear in any of your actual playlists. Alternately you can select any of your playlist to browse and play their contents directly.
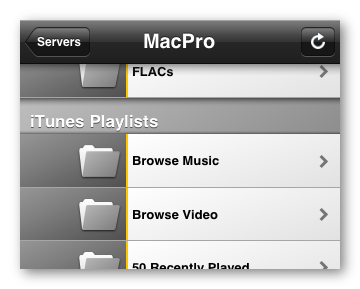
"iTunes Playlists" in StreamToMe.
Your "iPhoto Albums" appear after the "Shared Folders and "iTunes Playlists" and operate in a similar manner to the "iTunes Playlists". You can choose to either by search by event and faces metadata through the "Browse photos" option or you can simply select and browse your iPhoto albums directly.
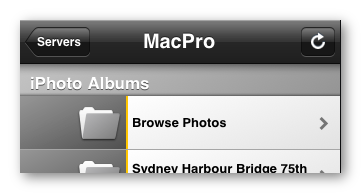
"iPhoto Albums" in StreamToMe.
The toolbar at the bottom of the folder view contains a button that will display the current view's "Sort Options". This will let you sort the current view by name or date. When browsing folders, the "Sort Options" also contains options to "Flatten the current view". This is very useful when viewing music or other files which may be categorized into a tree of subfolders but which you'd like to unify and play as though they were all one collection — select one of the "flatten" options and all files from all subfolders will appear as though they were placed together at the top level of the current folder.
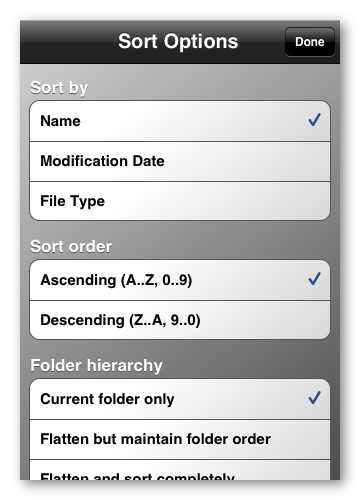
"Sort Options" in StreamToMe.
When you tap any file in StreamToMe, it will show a brief loading message and then play. Loading times can vary from less than a second to about 20 seconds depending on the network and any live-conversion the server may need to perform.

Starting playback
By default, the fullscreen player will appear. You can use the controls to seek within the file, skip to the next or previous file, skip back 30 seconds, select an AirPlay device (Apple TV or AirPlay enabled speakers).

Fullscreen playback
You can also use the button at the right of the fullscreen controls to switch between the fullscreen and embedded players. By default, the embedded player may be hidden. Use the "Show Player" button in the toolbar to show the embedded player if you can't see it.

Embedded player on the iPhone, portrait orientation
Tap the embedded player itself to show or hide the playback controls over it and use the fullscreen toggle button to switch back to fullscreen.
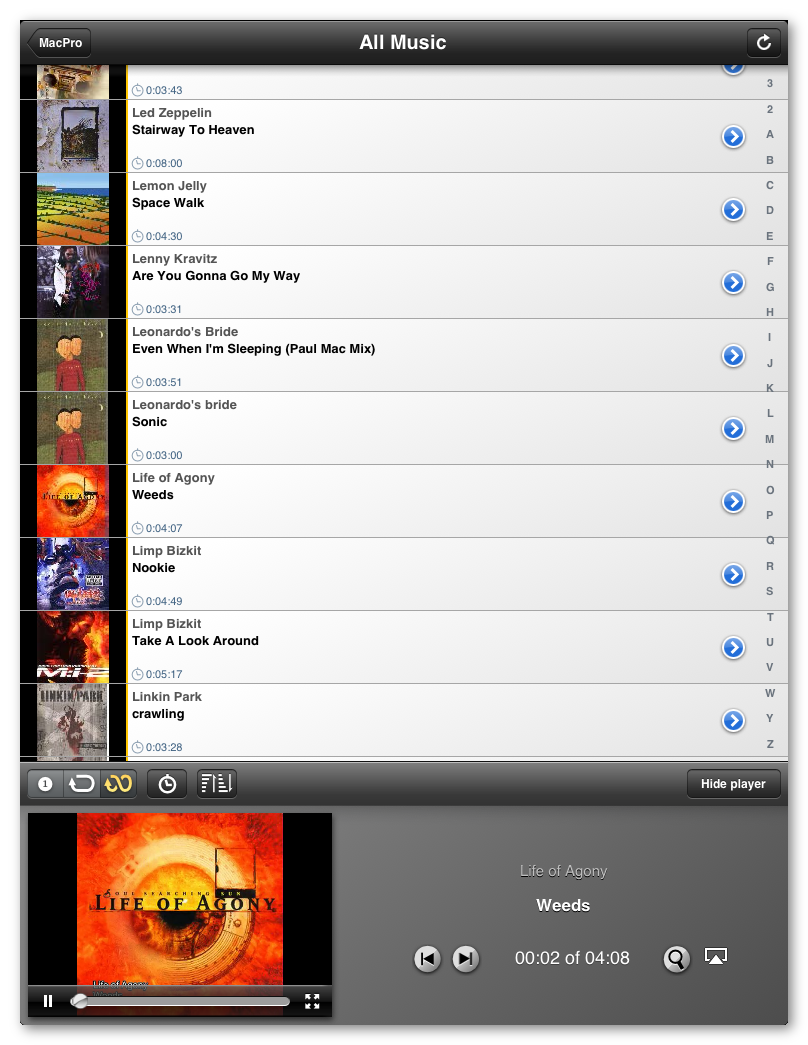
The iPad and iPhone offer the same functionality for fullscreen, embedded, portrait or landscape playback. But the iPad offers far more screen real estate in the embedded player.

Embedded player on the iPad, landscape orientation
And in portrait orientation...
Embedded player on the iPad, portrait orientation
When the embedded player is visible, newly selected files will start in the embedded player instead of fullscreen. Hide the embedded player again to have newly selected files start fullscreen.
By default, StreamToMe will start playing the next file in the current file's folder/view/playlist when the current file reaches its end. You can control this behavior from the "play mode" control in the left of the toolbar. The left segment is the "Single" mode and when selected will make StreamToMe stop playback when a file ends. The middle segment is the "Continuous" mode and will continue playing the next file (in order) until the current folder/view/playlist is complete. The right segment is the "Random" mode and will continue playing files in a random order from the current folder/view/playlist indefinitely.

Play mode controls handle single, continuous or random play modes.
Every file that appears in the StreamToMe player will have a small button at the right of its row. This button allows you to access the "Track Settings" for the file.

The button at the right of any file's row allow will take you to the "Track Settings".
From the "Track Settings" you can control bitrate, transcoding options (aka live-conversion options), player interface, additional volume boost or reduction, audio track selection, subtitle track selection, subtitle scaling, right-to-left subtitles, subtitle encodings and whether album artwork is displayed fullscreen while playing music files.

The "Track Settings" screen in StreamToMe.
Changes to the settings will not apply to any currently playing file. You must restart the file to apply changes (you can tap the file's row at the top of the "Track Settings" screen to do this).
By default, any changes you make in the "Track Settings" apply only to the current file. If you want to make a setting the new default, you should use the "Save to global settings..." button at the bottom of the "Track Settings" screen.

"Save to global settings..." at the bottom of the "Track Settings" screen.
When you press "Save to global settings..." select all the options that you'd like to save to the global settings and then press "Save".

"Save to global settings..." screen.
A full list of further topics is give on the StreamToMe support topics page.
If you're looking for information about more advanced settings, you might want to go to the Further features page to learn about some of the many settings and features in StreamToMe and ServeToMe that are not necessarily obvious at first glance.
We also discuss a number of other stream and quality options for handling difficult or unusual situation on some of our troubleshooting pages, including Troubleshooting: Quality Issues and Troubleshooting: Known Issues, so if you're having difficult with a particular file or file type be sure to check those pages for information on settings which may help.


